Simperium iOS/macOS is a bit like iCloud: you can use it to easily move data among iPhone, iPad, and Mac versions of your app. But you can also:
Simperium works with Core Data (and in the future, any JSON data stored in NSDictionary objects). As your users interact with your app, Simperium efficiently aggregates changes and moves them through our hosted, scalable service.
Changes are moved to and from Simperium as soon as possible. In the case where all devices are online, changes are moved in realtime. In the case where one or more devices are offline, data moves as soon as those devices come online. Conflicts can be resolved automatically.
Although the Simperium service hosts your app's data, you retain control. You can host your own services that can see and store all data that moves through the system.
In order to securely access their data, your users need accounts that will identify them. Simperium gives you a default system for user accounts with authentication dialogs that you can customize.
When Simperium moves data to and from other versions of your app, and your backend services, it currently expects that your Entity names will match the bucket names you're using in other versions of your app (e.g. Android, web). Entity attributes will appear as identically named fields in your JSON objects.
By default, all Core Data attributes for a given object will be tracked and updated by Simperium. To override this for a particular attribute, you can add spDisableSync as a key in the attribute's User Info with a value of 1.
Due to the asynchronous nature of Simperium, and for performance reasons, sync'ing operations for each bucket run on its own thread. Please, bear in mind that relationships might not be immediately available for usage, and thus, must be marked as optional
The best place to start is the Simpletodo tutorial. It will walk you through creating an app that uses Simperium, or you can browse the code for a finished version. When you want to add Simperium to your own app, follow the steps below.
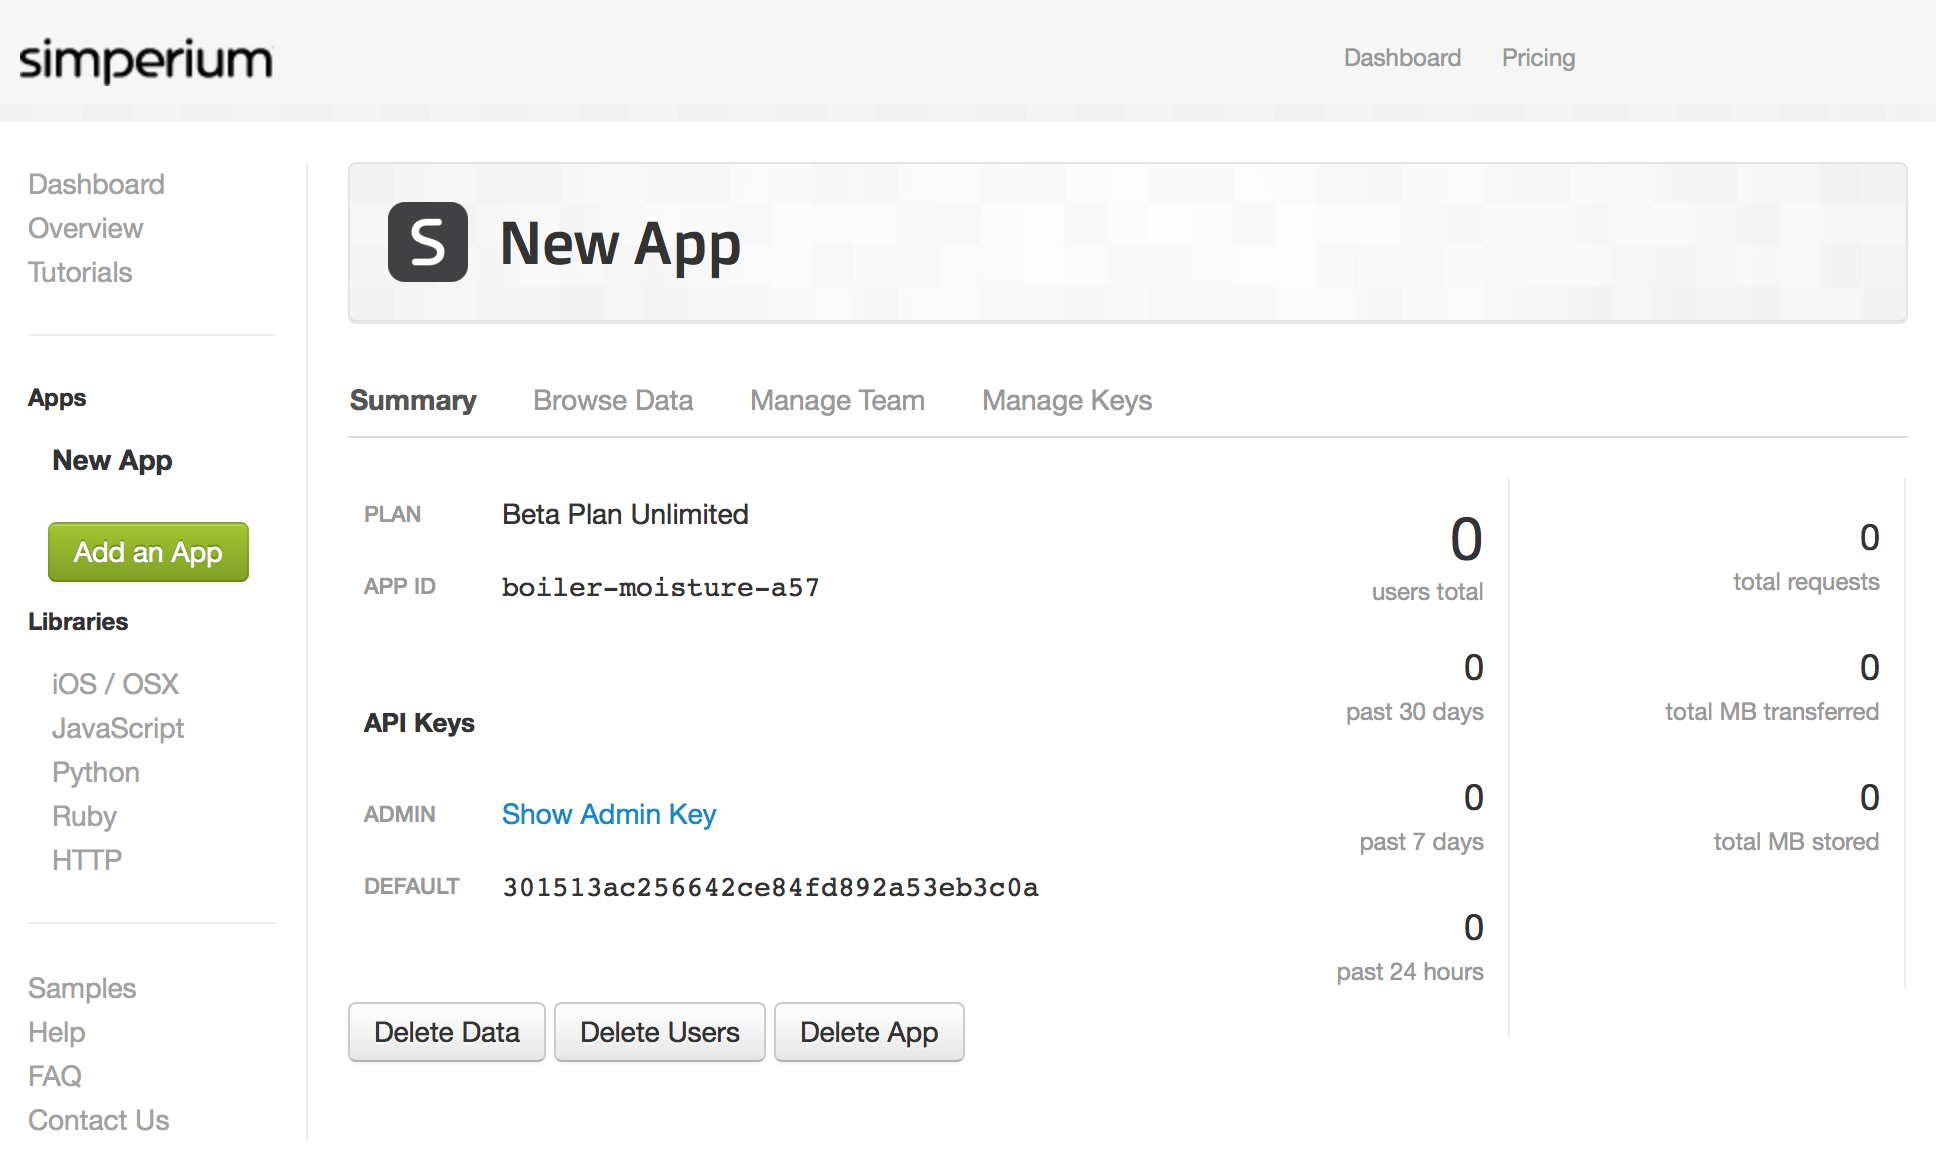
To begin using Simperium, you first need to add an app.
Name your app anything you'd like. You'll be directed to a page with the credentials for your new app.
To use Simperium iOS, you'll need to install Xcode.
To easiest way to use the latest release is to download a .zip file from GitHub. This has all the source code you'll need.
Or to use the latest version in development (potentially unstable) you can clone the Simperium iOS repository using git.
git clone https://github.com/Simperium/simperium-ios.git
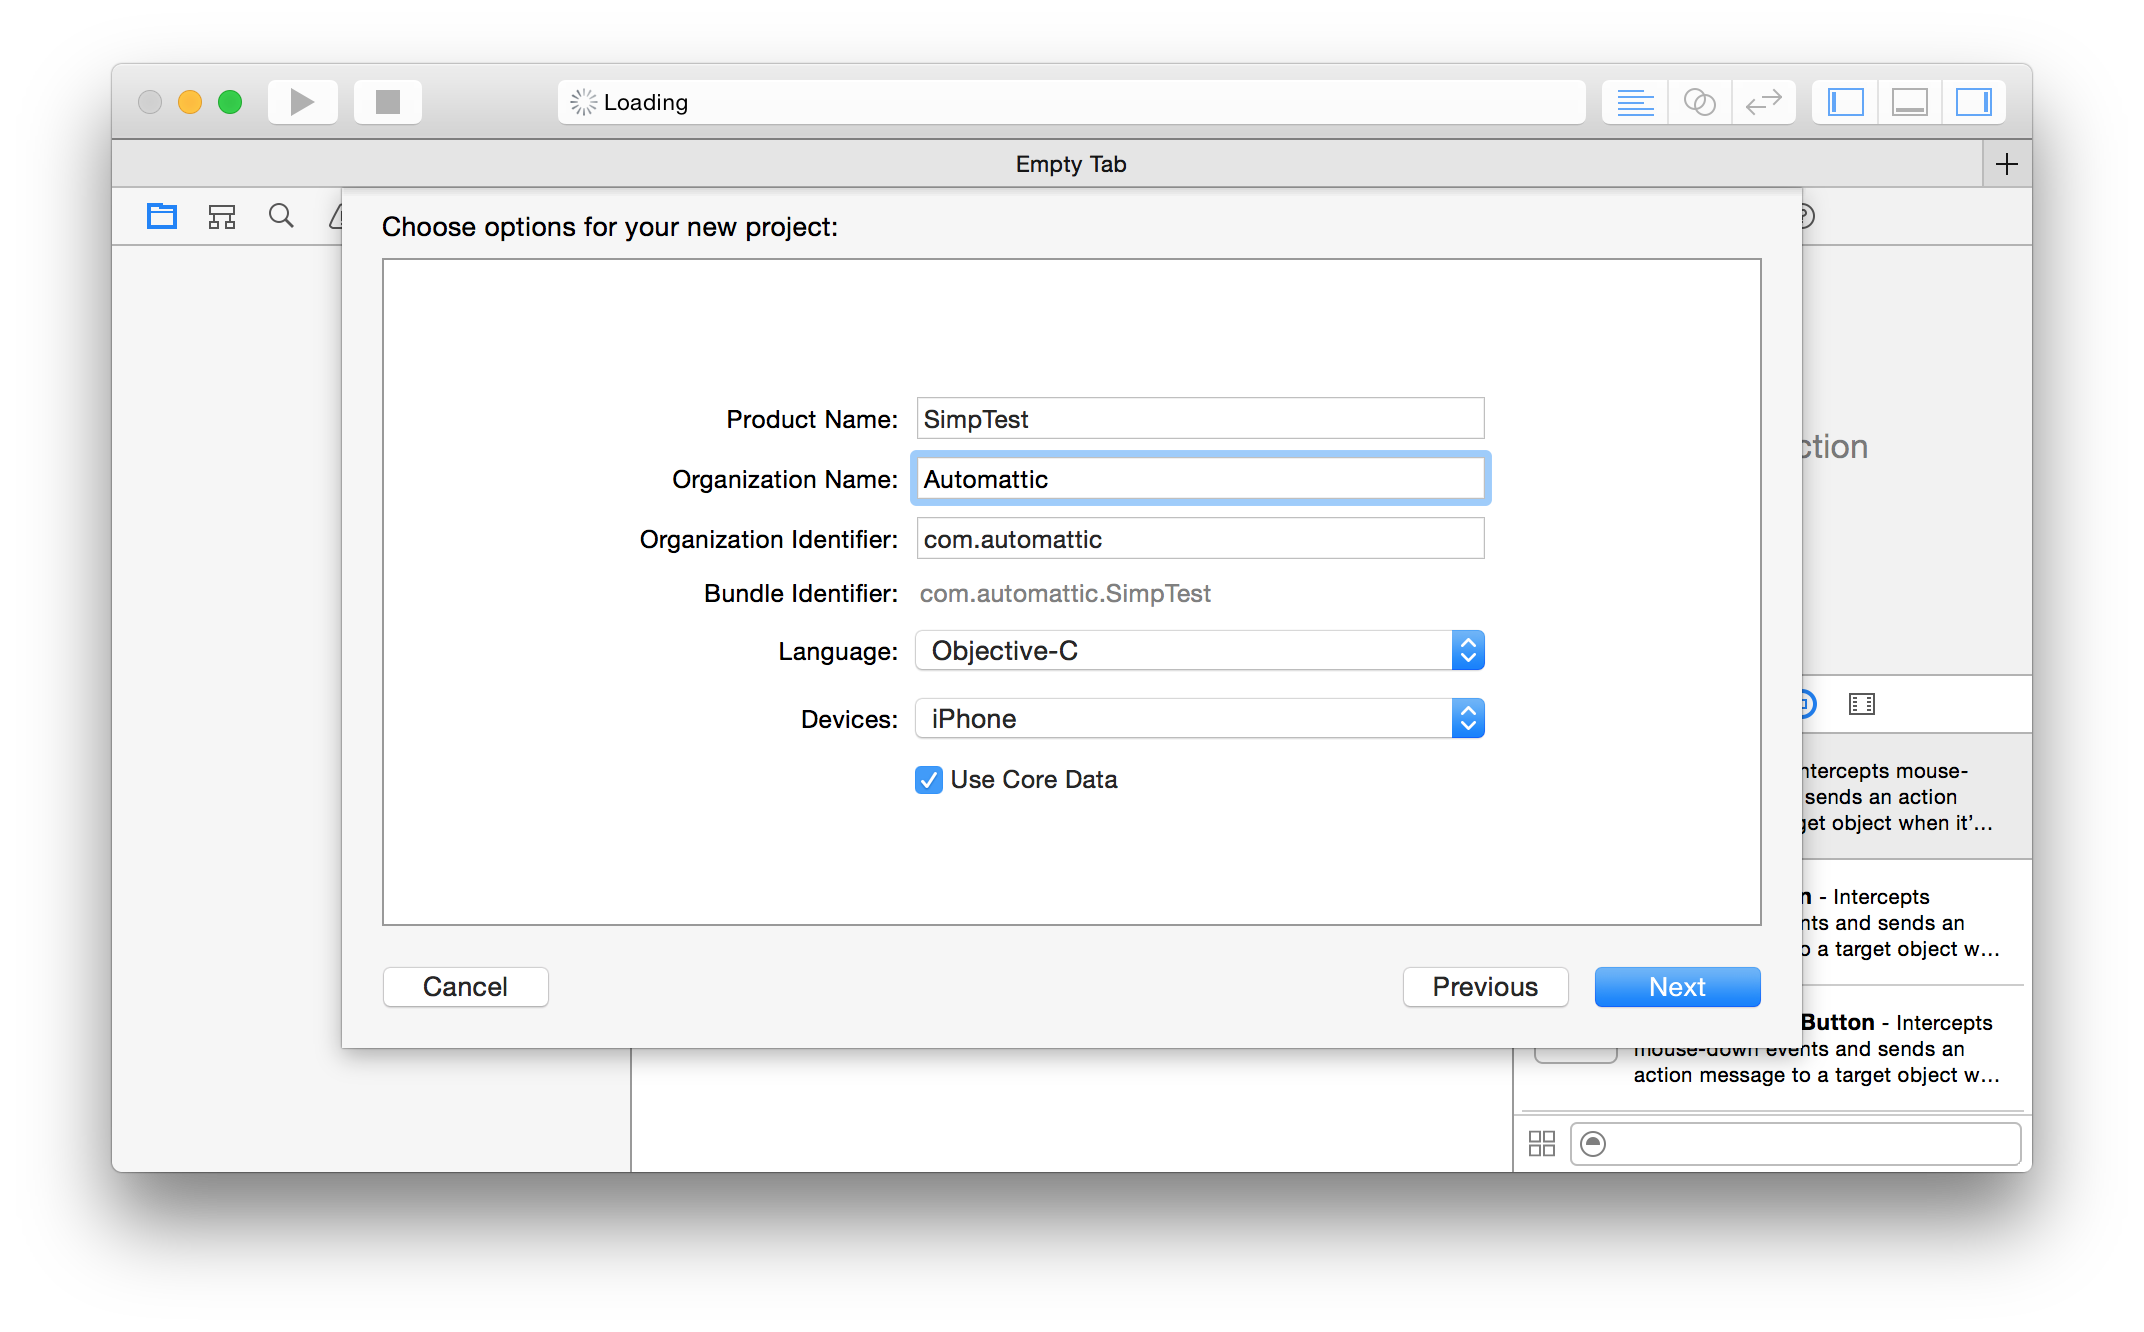
Create a new project, select the Master-Detail template and click next. Modify the options for your new project making sure that you've selected Core Data.
If you're adding Simperium to an existing project or a Xcode template that doesn't include the Core Data option click here.
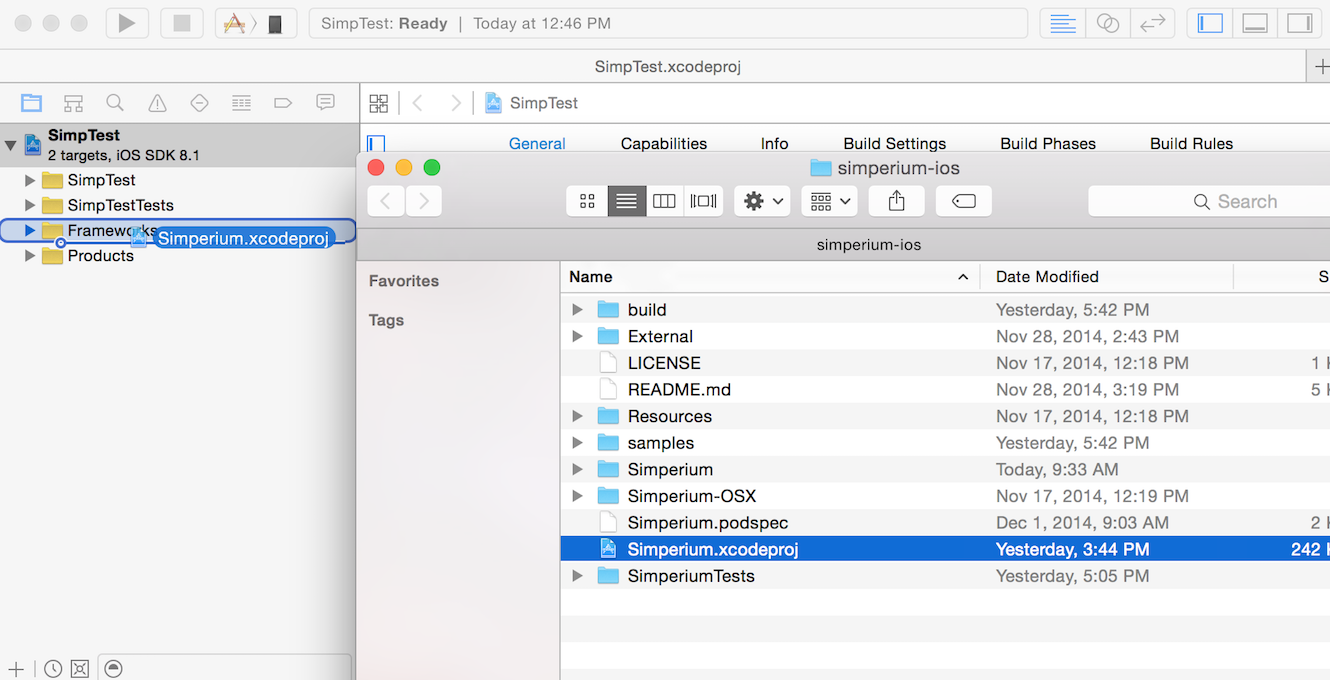
If you cloned the git repository, add (drag and drop) Simperium.xcodeproj as a subproject.
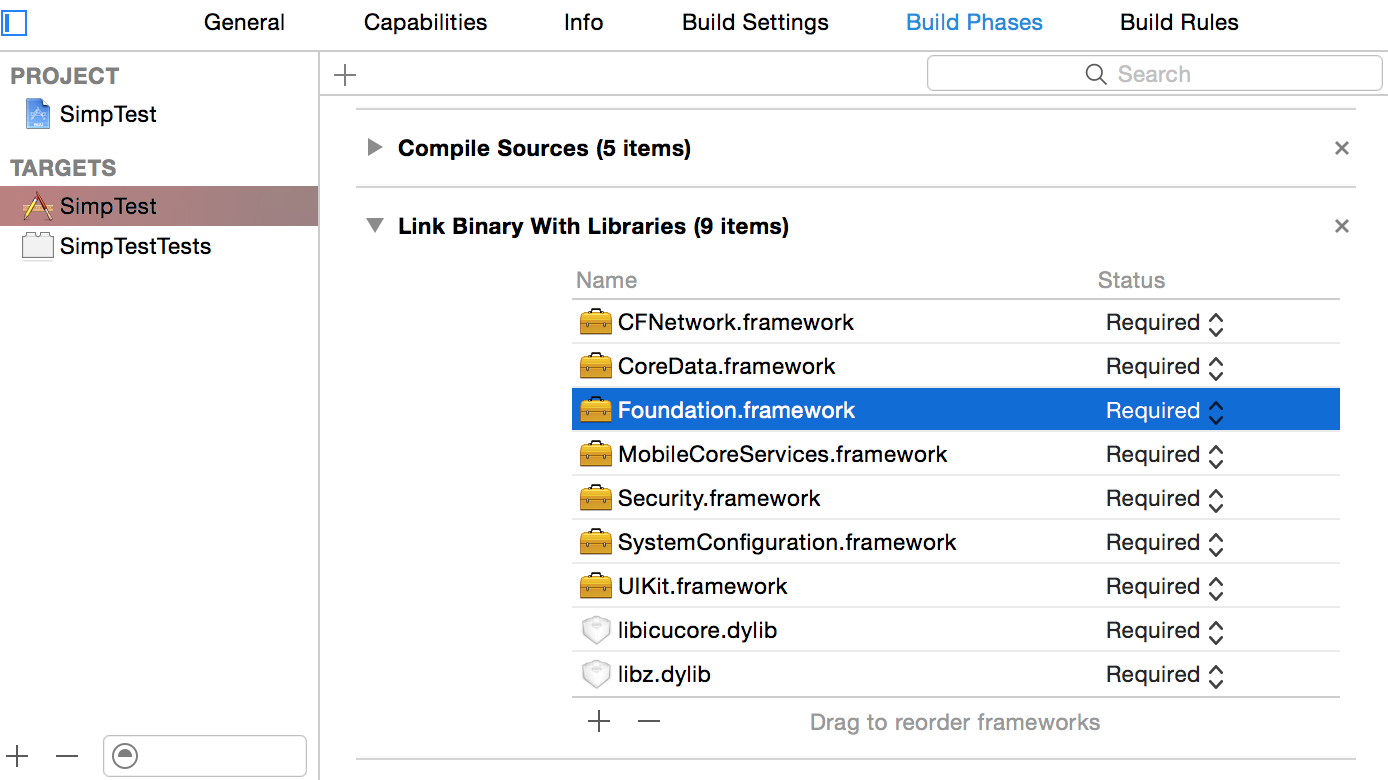
Under Summary scroll down to Link Binary With Libraries, click the plus button. Add the following libraries:
You'll also need to manually add libSimperium.a to the list. You'll find it in the project's "Workspace" in the same add UI.
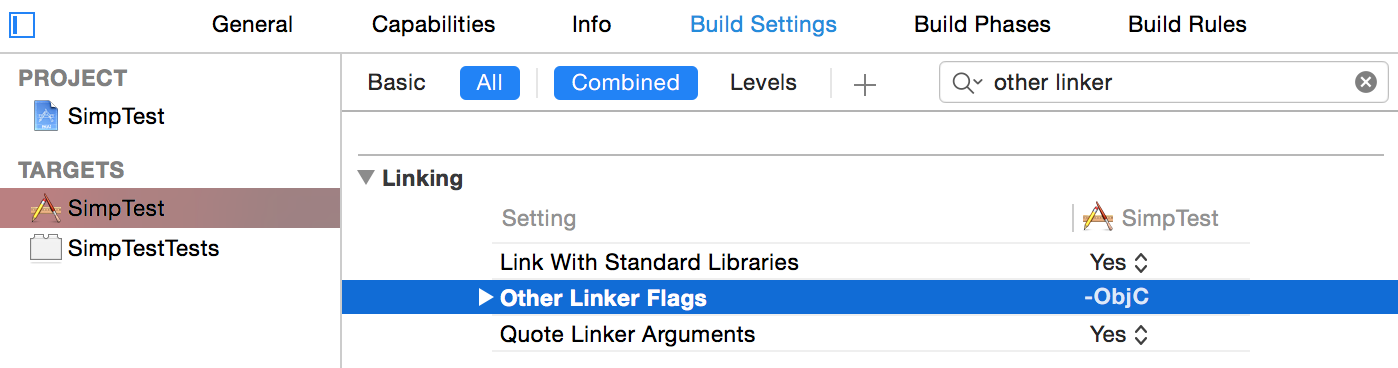
In Xcode, under Targets > Build Settings, search for Other Linker Flags in the Linker section and add -ObjC to avoid raising a JSONValue exception.
Now that your Xcode project is configured to use Simperium, you can import and add some code to start it.
Open AppDelegate.h and:
#import <UIKit/UIKit.h>
#import <Simperium/Simperium.h>

@interface SPAppDelegate : UIResponder <UIApplicationDelegate>
...

@property (readonly, strong, nonatomic) NSManagedObjectContext *managedObjectContext;
@property (readonly, strong, nonatomic) NSManagedObjectModel *managedObjectModel;
@property (readonly, strong, nonatomic) NSPersistentStoreCoordinator *persistentStoreCoordinator;
@property (readonly, strong, nonatomic) Simperium *simperium;

...
@end
In AppDelegate.m modify the method as shown on the right to initialize a Simperium instance.
Once you're comfortable with Simperium you may prefer to initialize Simperium elsewhere. It's a good strategy to initialize a Simperium instance in your app delegate or in a UIViewController and start it with the credentials for your app.
- (BOOL)application: (UIApplication *)application
    didFinishLaunchingWithOptions: (NSDictionary *)launchOptions {

    ...

    _simperium = [[Simperium alloc] initWithModel:self.managedObjectModel
    			context:self.managedObjectContext
    			coordinator:self.persistentStoreCoordinator];

    ...

    [_simperium authenticateWithAppID:@"{SIMPERIUM_APP_ID}"
    			APIKey:@"{SIMPERIUM_APP_KEY}"
    			rootViewController:_window.rootViewController];

    ...

    return YES;
}
Simperium will automatically perform disk operations in background, keeping your main thread available, and your UI smooth.
- (NSManagedObjectContext *)managedObjectContext {
    if (__managedObjectContext != nil) {
        return __managedObjectContext;
    }

    __managedObjectContext = [[NSManagedObjectContext alloc] initWithConcurrencyType:NSMainQueueConcurrencyType];

//  Remove this line:
//  [_managedObjectContext setPersistentStoreCoordinator:coordinator];

    return __managedObjectContext;
}
...
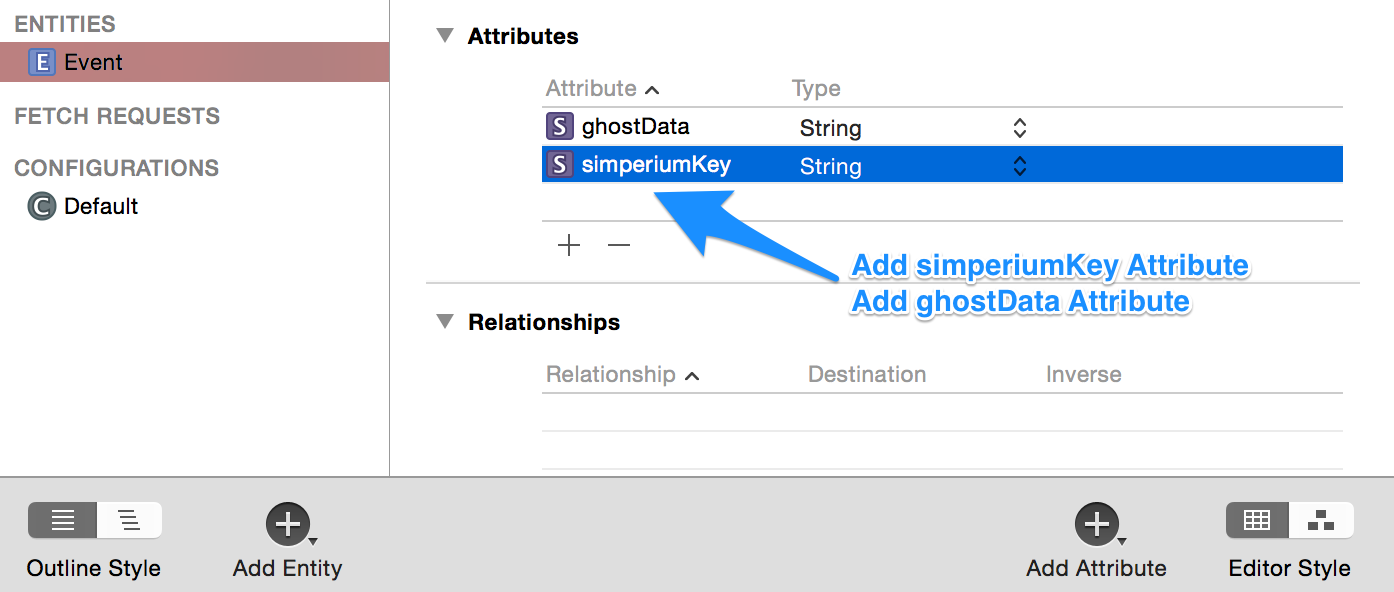
Simperium requires some extra data inside your Core Data model.
Open your Core Date file ending in .xcdatamodeld and add the following two attributes to each one of the entities you would like to sync:
Once ready, you will also need to update the NSManagedObject subclass'ess for the entites you need to sync:
See the iOS Simpletodo tutorial for more details.
#import <Simperium/SPManagedObject.h>

@interface Event : SPManagedObject
...
For the most part, using Simperium on OSX is the same as using it on iOS. On OSX, you need to use Simperium-OSX.xcodeproj, and include <Simperium-OSX/Simperium.h>.
Also, use initWithWindow: to instantiate Simperium, and pass an instance of NSWindow so that the authentication dialog can be displayed for your users.
The framework dependencies are slightly different: Cocoa, CoreServices, WebKit, SystemConfiguration, Security, libicucore, libz.
If you're using the App Sandbox, you'll need to make sure your app has network entitlements. You can follow Apple's guidelines.
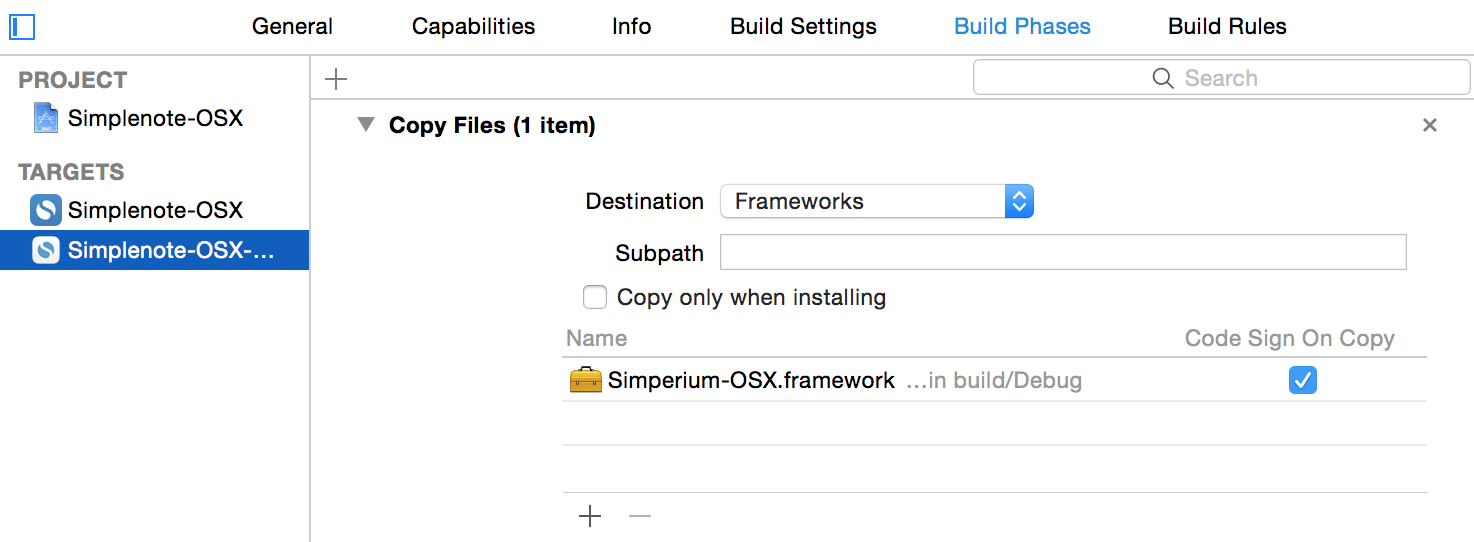
There are two additional steps to make the framework link properly on OSX. First, in the Build Phases tab for your target, add a Copy Files build phase using the button at the bottom, and choose Frameworks as the Destination. Drag Simperium-OSX.framework from your project into the list area as shown in the screenshot.
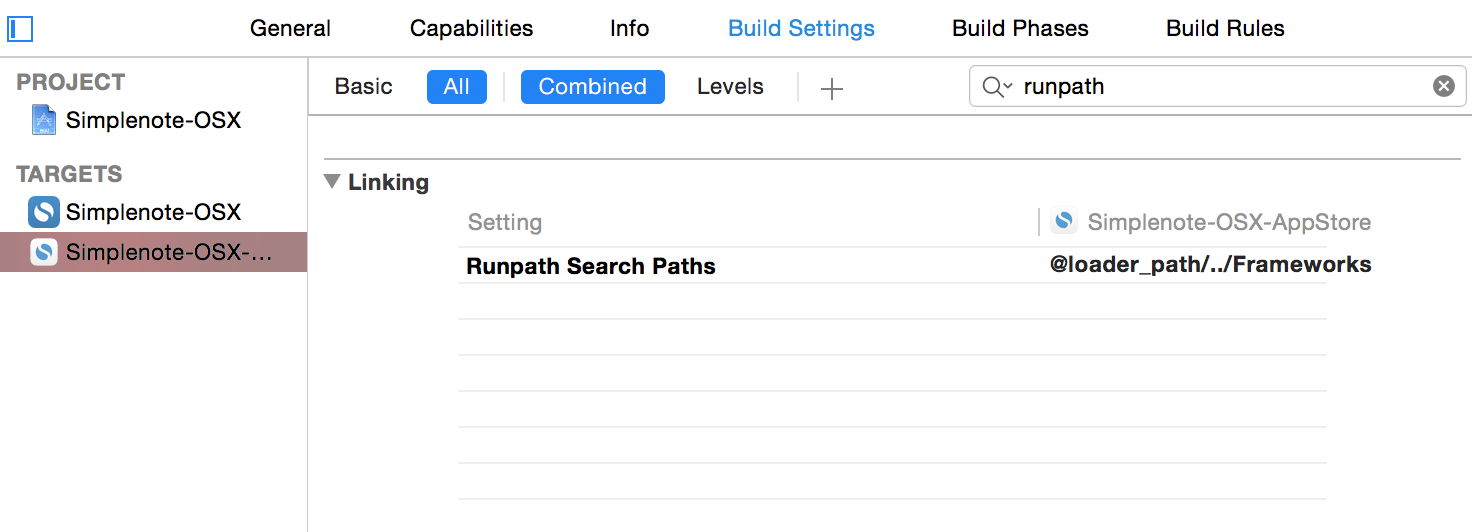
Second, in your target's Build Settings, set Runpath Search Paths to @loader_path/../Frameworks.